



Getting adsense approval is very hard today because there are many blogs being created everyday and Google needs to be sure a website meets all the requirements before approval. Keep in mind that adsense reviews each blog manually meaning it's going to be reviewed by humans so you have to impress them or you might not be approved.
What is Adsense
Google AdSense is a program run by Google that allows publishers in the Google Network of content sites to serve automatic text, image, video, or interactive media advertisements, that are targeted to site content and audience.
It is is a CPC (cost-per-click) advertising program that allows publishers (anyone wanting to put ads on their websites) to insert a small amount of HTML into their sites and have ads appear that are targeted and relevant to the content of the site.
How Google AdSense Works
The way AdSense works is this; the webmaster (you the owner of the blog) inserts the AdSense JavaScript code into a webpage (a page on your blog). Each time this page is visited, the JavaScript code uses in-lined JSON (JavaScript Object Notation) to display content fetched from Google’s servers.
In order to have the AdSense code to insert in your blog, you must be approved by Google adsense. You can also buy adsense account if you want to skip this but i do not recommend this because adsense can ban your account if you are discovered.
Google AdSense team is still looking to approve AdSense applications from publishers who would provide quality content.
The more publishers join the program, the more money Google makes because they will have more platforms (blogs/websites) on which they will advertise for their clients.
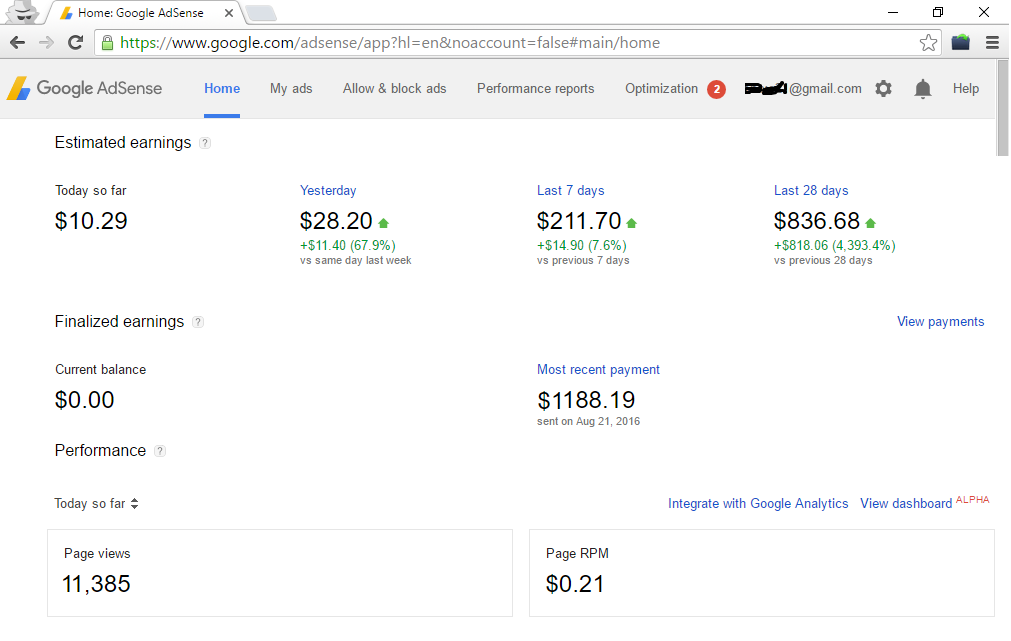
“If you own a blog that was rejected by AdSense, I want you to sit back and re-evaluate your blog”.
Ask yourself some questions…
(1) First; does my blog or website provide any value?
Of course, you will be able to answer this question when you look at the number of page views as well as user engagement in your blog or website.
The value of your blog is not known to you alone, Google knows it too. Google has designed intelligent robots to do the spying for them.
Another important question you need to ask yourself is, Do I have original content on my blog or website?
(2) What are original contents – by Google’s Definition?
Many bloggers do not understand what Google means by “original contents”.
Original contents – according to Google’s definition, means – those contents (articles, pictures, videos, podcast, ideas, etc) that you create yourself and have the right to be named the author of, and own copyright of the said contents.
That is why Google brought up and considered authorship and reputation as a key ranking factor.
This is very important because, most bloggers re-write articles to make them pass the plagiarism test while the idea still remains the same with the already-existing articles. In this case, you are actually saying the same thing in a different way – nothing new.
Sometimes, the Google AdSense team will ask, what makes a user visit your blog or website and not visit others. That is when the issue of uniqueness and originality comes into play.
So how do i get approved by Adsense easily
To get approved by adsense you must read their policy to know the do's and don't. Many bloggers make the mistake of ignoring the policy when applying for adsense and they may end up getting banned afterwards.
Now lets get to the issue on ground

- Choose a Marketable Niche
What is a niche? – Consider a niche as an area or a subject which your blog or website is all about. We have niches like, Education, Technology, Arts and Culture, Celebrity, Health, Banking, Airline and Flights, etc. For example, if you say your niche is Health, this means that all articles on your website or blog must relate to health in at least one way.
You have to choose a niche that complies with Google content guidelines. Some niches are not profitable in AdSense.
There are some niches that advertisers are willing to pay heavily to advertise on, but unfortunately, very few people or none write on such niche. A typical example of such niche is “distance learning”. The keyword is so competitive that an advertiser would be willing to pay as high as $5 per click from Nigeria and $15 per click from the United States (US) or United Kingdom (UK). You can see the top 10 profitable niches for blogging in Nigeria
- Buy a new domain
The next thing is to get a new domain name. When buying a new domain, please choose niches that have advertisers or physical products you can sell or promote, this is pertinent in case AdSense turns out not to be the only way to monetize your site and/or content.
Again, there are some niches that Google may not allow in their AdSense program maybe because the niche is over-crowded or because there are few or no advertisers in that niche. A good example of such niche is Celebrity and How-to technological niches.
- Host Your Blog on Blogger or WordPress
You will need to host your domain. You can host for free with Blogger or buy a hosting plan from any of the hosting companies around.
If you are a newbie i'd advise you to use blogger.
I read in Google AdSense product forum that Google may not accept BlogSpot blogs again in their AdSense program even though BlogSpot is still their main partner.
Write – “about me” page
Google AdSense Team respects an “About me” page. Just create a page and write what the blog is all about, about the author and bla bla bla… An “About me” page should be at least 300 words. It should also be appealing, concise and informing.
Create a contact page
Google said that you should provide an easy way for your blog users to contact you if they ever wish to.
This is achieved by creating a contact page and listing it in the menu section of your website or blog. It’s easy to create a contact page. There are various contact widget for blogger and plug-in for WordPress.
You have to display a contact page vividly if you want to get AdSense approval on your new blog.
Write – “Privacy Policy Page”
You can visit any blog with a privacy policy page, copy and edit it by replacing all instances of the person’s blog name with yours.
Alternatively, you can visit the website: freeprivacypolicy.com to get a free copy of privacy policy, copy and paste it on your own privacy policy page.
Publish (Only) Original Contents:
Write and post about 40-50 original posts of at least 600 words (not copied articles, image or re-written articles). Try as much as you can to create or craft original contents. Make it compelling and detailed if possible.
Do not use any image if you don’t own it, and also do not re-write articles, instead, write on new subjects and ideas based on your experience.
You can use keyword tools like Google keyword planner to select keywords that are still popular but not very competitive.
Customize your blog properly:
Recently, I’ve realize that blog design is now a factor considered by AdSense team for either approving or rejecting applications.
I advise that you get a nice blog theme and customize it properly, first to suite the niche of your blog, and second; to appeal to you and other users of your blog. Also, do not fail to ensure that the theme or template you choose must be, or customized to be, responsive (adapt to all browser and device environments).
Insert a search form on the sidebar:
A search form is a very cardinal module. Putting a search form in a website or blog is a very simple thing to do. For those that blog with BlogSpot, simply visit the widget section and insert it via the template area. For others who blog with WordPress; navigate to Appearance > Widgets.
There you can drag a sidebar widget to the position in the sidebar where you want the sidebar form to be inserted. For WordPress bloggers, be informed that the presentation of the widget page may vary depending on the WordPress theme and/or specific sidebar management plugin you use on your blog.
Disable “Copying” from Your New Blog
If you are quite a newbie in blogging, I will advise that you disable copying of your articles. Otherwise, once people copy your original article and publish on their blog, they render your blog useless because it will not pass the plagiarism test anymore since its contents do appear on other websites/blogs.
If you blog with WordPress, you can disable copying from your blog using a plugin. You can find such a plugin if you perform a search for it using Google.
Build your sitemap and submit to Google, then display your sitemap on the menu section of your blog.
Sitemaps enable Google bots to understand the skeleton and building blocks of your blog.
It enables the search engine bot to know how many pages your website or blog contains, as well as how many articles are published.
Many people who apply for AdSense usually get rejected in the second stage of the eligibility test (after code implementation test). One of the profound reasons behind this is that the second stage of AdSense eligibility test is handled by robots, this is usually after the first review by a human.
If your blog must pass the eligibility test, then your blog must be understood by Google robots.
So, creating a sitemap makes it easier for robots to quickly navigate your blog in order to ascertain whether or not it is eligible for the AdSense program.
Verify your blog in Google webmaster’s tool
If you are using blogger, follow the steps below;
Visit Google Webmaster’s Tool
Click the “Add a site” button on the Webmaster’s Tool Home page
Enter your blog’s URL (for example, googlewebmastercentral.blogspot.com) and click the “Continue” button to proceed to the next stage.
On the next page that comes up, select “Meta Tag” verification method, then copy the Meta tag provided.
Go to your blog and sign-in
From Blogger’s dashboard click the “Layout” link for the blog you’re verifying.
Click the “Edit HTML” link under the “Layout” tab which will allow you to edit the HTML codes for your blog’s template.
Paste the Meta Tag (copied in step 3) immediately after the <head> tag within the template HTML and click the “SAVE TEMPLATE” button.
How to verify your WordPress blog
There are many ways to verify your WordPress blog in Google webmaster’s tool. One of the ways is the use of a plugin.
For the simplest way, download this plugin; https://wordpress.org/plugins/verify-google-webmaster-tools/
In your WordPress dashboard – Admin, navigate to; Plugins > Add new > Search for ‘Verify Google Webmaster Tools‘.
Activate the plugin through the ‘Plugin’ menu in WordPress
Copy verification Meta-Tag from Google Webmaster’s Tools and paste it in the Plugin’s settings page (Admin > Settings > Verify Google Webmaster Tools).
Click ‘Save’ and it’s done!


No comments:
Post a Comment